The Reload
Tidy packages for sugar propellant grains.
This page pulls together several techniques developed over the last few years
to produce sugar-propellant reloads for Aerotech - type casings.
An executive summary might read:
-
Make tubes: inhibitor and case liner
-
Make the propellant
-
Mold propellant into the inhibitor tubes
-
Insert grains in inhibitor tube
-
Seal with foil tape
Tools:
The only "special tools" one will need are two hardwood dowels. Lots
of other fiddly bits will be used as we go along, guess I should make a list
of them eventually.
Dowels: one 1-1/4 inch diameter for making the case liner tubes, and
another 1-1/8 inch diameter, for making the inhibitor tubes.
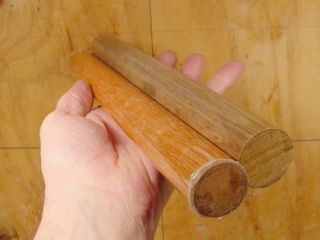
Find nice hardwood dowels, straight and reasonably round. Cut sections
about a foot long, and sand them nicely.
The larger dowel is for rolling case liner tubes, and is left unfinished.
The smaller one is for rolling inhibitor tubes. It is covered with
plastic adhesive tape, because it will be exposed to wood glue and we don't
want it to stick.
I am sure that metal or plastic rods could work just as well, but this is
what I have, and it works.
Duct Tape !
Another essential is Aluminum Foil Duct Tape. Note that this is NOT
the plastic kind! I am using Nashua 322 and Nashua 324A from Tyco Adhesives.
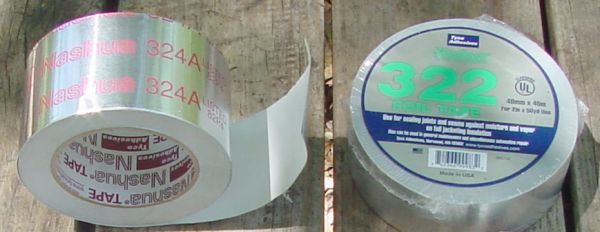
The only differences between these two that I can ascertain is that the
324A is 2-1/2 inches wide, 322 is 2 inches wide.
Also, that 324A has its name written all over it, but 322 is plain foil-colored,
much prettier! I wish the 324A did not have lettering.
This is incredibly useful stuff.
Inhibitor tube
Inhibitor tubes should be made first, as they need to dry a day or two
before using.
Obtain a piece of common posterboard. I am using Royal Brites # 24301 (white) which
measures 0.011 inch in thickness.
This is available at my local supermarket - the white board is $0.59 for
each 22x28 inch sheet.
Office Depot has them in packs of 10 for about $4.00
Colors cost a little more - I use them sometimes because I like them, and because it
makes the different tubes more apparent in these photos.
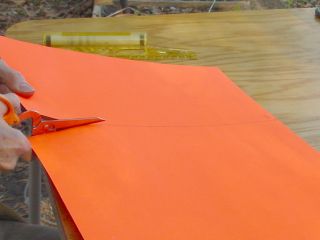
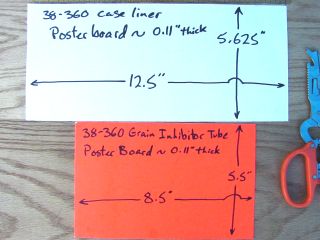
I begin by cutting a piece of posterboard 8-1/2 inches long by 5-1/2 inch
wide. Be sure to determine the bias of the board first, and cut so
that the bias is with the long side. Bias is the direction that the
board "wants" to roll. It will roll much more smoothly and easily in
one direction than the other. Usually, you can determine the bias by
simply rolling the board into a tube. It will be much easier one way
than the other, which will tell you the bias.
Some posterboard does not have a pronounced bias and doesn't like to roll
in either direction. Guess that is good if you are going to use it
as a poster and want it to lay flat, but it is not good for these tubes.
The board pictured below is of this type. It did not roll very
well. If you find your board is like this, do the best you can - it
is possible to make it work. But buy another kind next time.
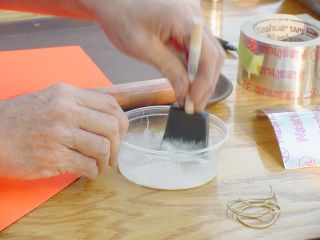
Now we mix a little glue with water, roughly half and half. I usually
use Titebond wood glue. But Elmer's works fine, it's just a little
thinner so don't dilute it as much. Now that I say that...I forgot
it was Elmer's, poured in too much water and had to add more glue. Oh
well. It's cheap.
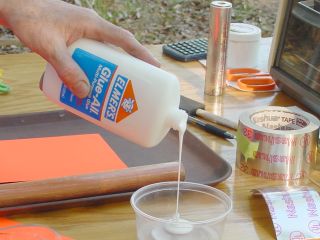
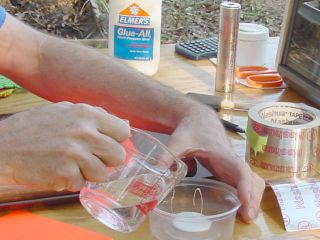
The glue/water should be mixed to a creamy texture, perhaps a bit frothy.
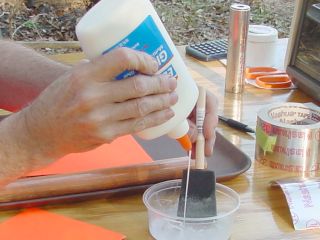
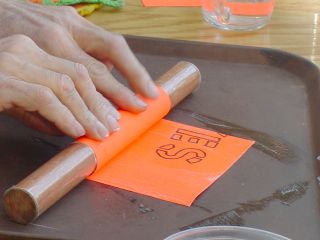
Slather it onto one side of the posterboard nice and even, roll the
board once around the 1-1/8 inch dowel, and be sure to "tuck" the leading
edge under the dowel. It will make a "squinch" sound and feel as it
tucks under the edge. Press and roll the dowel to roll up the rest
of the posterboard.
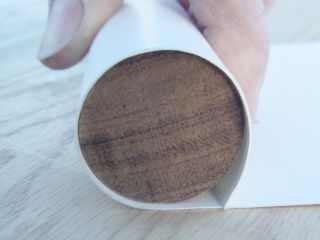
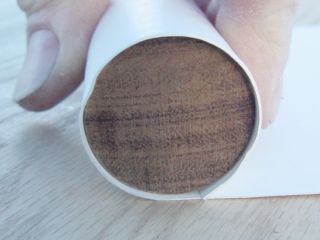
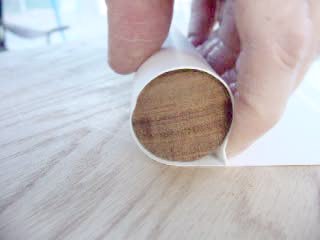
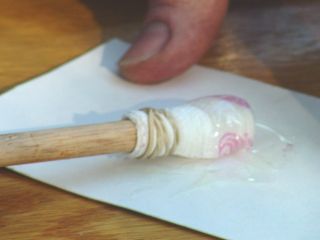
What do I mean by "tuck" and "squinch"? Here are a couple of photos:
First one is untucked. Second one is tucked. Work your fingers down
to where the action is to make sure the leading edge is well tucked before
continuing the roll. Otherwise, it will be oversized, and may have
delaminary gaps. Click here for a movie
of "the squinch." It is the clicking noise you hear as I am tucking
the ear under.
Let the slathering begin. Remember I said to "obtain" posterboard? I
suggest buying it, and usually do. Money tends to facilitate these
kinds of transactions. In this case it is only a little money, so be
generous. But this particular posterboard was obtained. I saw
it lying around in a classroom for weeks after the the presentations on that
topic were done. When Winter Break came and we did a little classroom cleanup, it was fair game and I absconded
with it. Hee hee hee! I love Education!
Secure the newly-rolled tube with several rubber bands, slide it off the
dowel, and stand it on end to dry. If you lay it flat, it is likely
to dry in an elliptical shape.
It's not a bad idea to wipe the glue off the dowel before starting another
one. I have ruined more than a few strips of posterboard by gluing them
to my stick.
I use the disposable foam brush not because it is cheap, not because it
is convenient, but because it is the best brush I have found for this purpose.
And you don't have to throw it out - just wash it well before the glue
hardens and it will be as good for the next round. You can just throw
it in the washing machine with a load of towels, but don't let the S.O. see
you do it. And you had better be the one to get it out too.
That tube needs to dry for a day or two. But if you are in a hurry,
let it dry for an hour and then put it in a low, low oven, perhaps 150 degrees,
and leave it for another hour. That should dry it fairly well. Bruce
Clemens says he puts them in the microwave for a few seconds to set the glue.
I haven't tried that yet, but will!
Case liner
This is also made from posterboard, but it does not need to be glued. Instead,
it is wrapped with the aluminum foil tape mentioned above. I am using
a different color in these photos so that it is easy to tell which tube I
am working on. In practice, the color matters only in that some of
the colored boards are a bit thinner than the white ones.
Cut a strip of posterboard 5-5/8ths inches long by 12-1/2 inches wide. Again,
cut across the bias so that it will roll easily the long way. Cut two
strips of Nashua 324A, each about an inch longer than the strip is wide, say
7 inches.
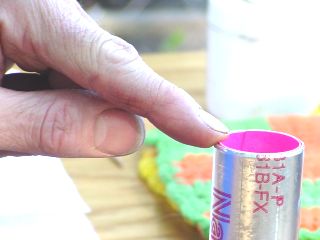
Twelve and a half inches is enough to circle the inside of a 38mm motor
tubing three times, with just a little overlap.
I find that two thickness is usually enough, three gives us a bit of insurance.
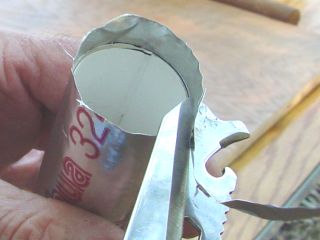
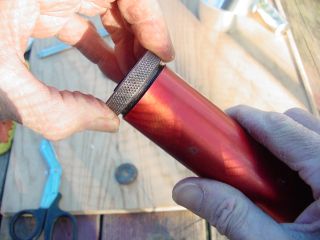
The tube is rolled, and the end trimmed to leave about 1/4 inch tape all
around. The dowel is used to press the tape nice and square, getting
ready for the next operation.
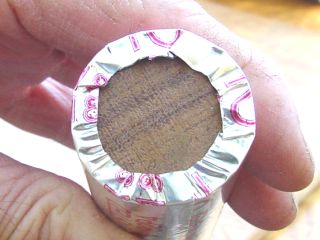
Note that one end of the larger dowel is tapered. The last 1/8 inch
or so has been sanded to a 45 degree angle, making a truncated cone. That
is to assist in this pressing procedure, to ensure an even squeeze.
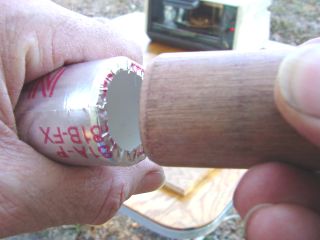
Insert the tapered end into the tube, pressing the edge of the tape back
against the tube wall. Do both ends, slide the tube back on the dowel
and roll it on the table a time or two. Remove the dowel and notice
what a pretty crimp has been made. Nice, smooth, even, O-ring-supporting
edges.

Making the Grain
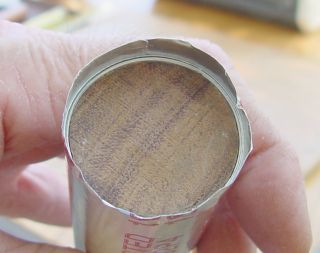
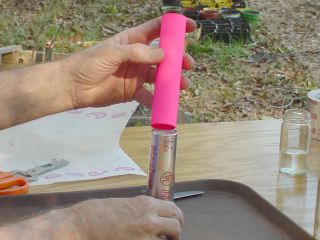
Because of the different sizes of dowels used in making the two different
tubes, they are matable. The inhibitor tube slides into the case liner
tube with little effort, but also with little wasted space.
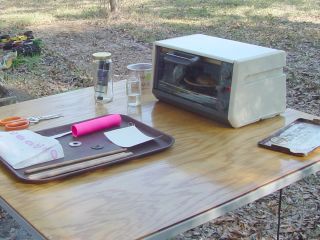
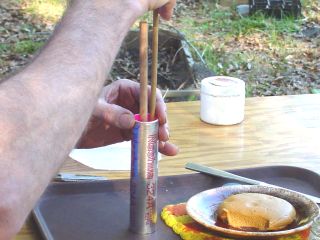
Here we are getting ready to make the propellant grain. It will need
to happen quickly once started, partly because I am impatiently using 5-minute
epoxy. Also because it is a chilly today in our "Winter Wonderland"
and I am out in the breeze. The propellant is heating in the toaster
oven at 200 degrees, but once out it will cool very quickly. This batch
has 1 percent Ti added, so it will look a bit dowdy, gray and grainy. But
wait until you see the exhaust plume! It is also a slow-burning batch
of toaster-oven propellant, but that reeks of another experiment.
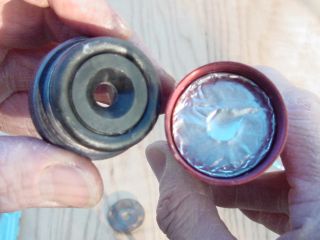
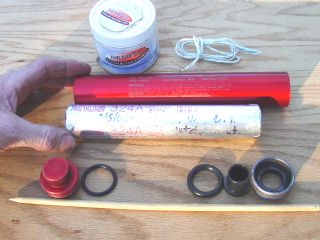
OK, here is a heads-up on how things will go together.
The case liner will serve as a support for the inhibitor tube while
we press soft propellant into it. The inhibitor tube will be coated on the
inside with epoxy before the propellant goes in.
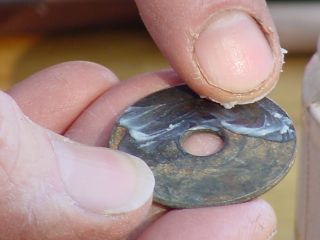
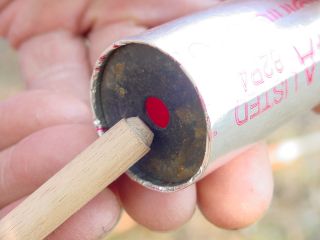
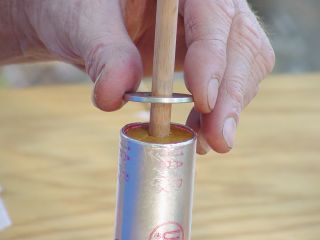
The liner will hold a 1-1/4 inch "fender washer" which has a .281 inch diameter
hole in the middle of it. The dowel you see is our coring rod. The
end has been sanded to a point, then most of the point sanded off to make
a short truncated cone. The cone is then pressed real hard into that
washer to make a little shelf. This will serve to keep that end of
the coring rod centered while we press in the propellant.
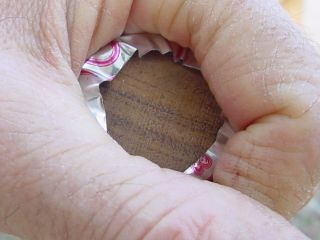
Note once again that the inhibitor tube fits nicely into the liner. But
before it goes in, we must coat the inside of the inhibitor tube with epoxy.
Epoxy? Why? That seems like an awful lot of trouble...
Why? To make the propellant stick! Candy propellant will often
stick to paper products, but not reliably. Yeah, I know - some people
cast directly into the paper with no glue and get away with it. But
they are usually using a melt/cast propellant which may well be stickier than
mine. So if it's important, I hedge my bets and glue the tube.
Topside of the washer is greased before inserting into the liner tube. We
don't want epoxy sticking to it, or propellant!
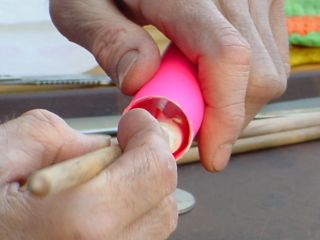
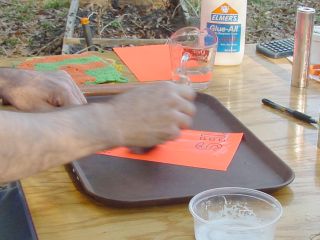
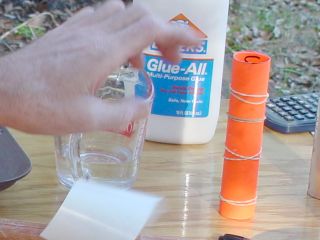
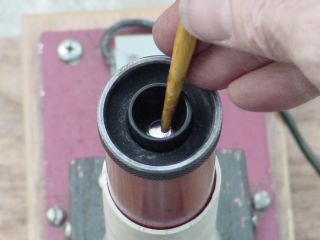
Make a tool. Take a section of doweling at least 8 inches long, cut
a strip of paper toweling, wrap tightly around the end and secure with a
rubber band. This is the epoxy swab. Here I am dancing it in a
glob of 5-minute epoxy, about 1/4 teaspoon. It doesn't take much, just
enough to get a complete, even coating inside the tube. I move the
swab around and around, then back and forth, then around again and look at
it.
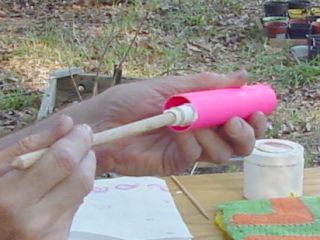
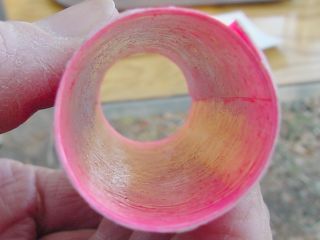
That looks good! If you see any dry spots, big globs or struggling
insects, feel free to take corrective action. Small insects can stay
in the tube. They will probably die from the epoxy coating anyway,
since insects breathe through their carapace. Might as well go in a
blaze of glory. Large insects should be removed. They might reduce
ISP.

Now the coring rod has been dipped in water (yes, water!) and wiped off.
This is the mold release agent that will allow the rod to be withdrawn.
It is environmentally friendly, cost-effective, and it works. Please
do use it.
Flash forward, November 2005:
I have since realized that Vaseline works much better than water.
Vaseline is more persistent, and does not moisten the grain.
Now I am recommending this finger-friendly grease as the coring
rod release agent.
The propellant patty is out of the oven, the epoxy is starting to cure...
it's showtime!
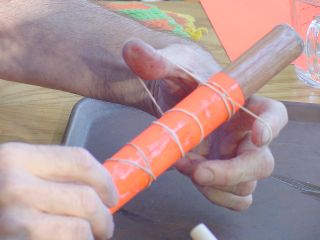
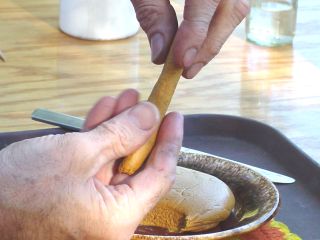
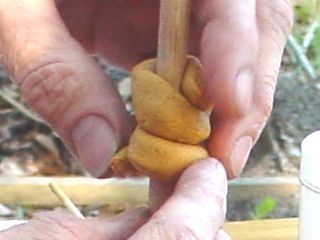
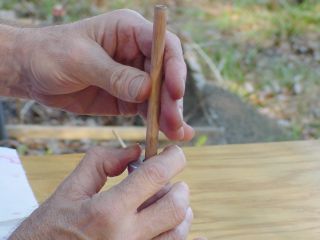
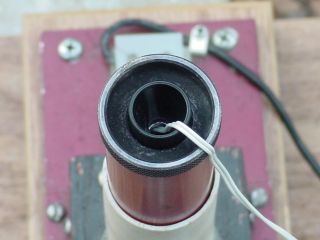
A chunk of propellant is cut off with a table knife, and formed into a "snake."
Snake is slithered around the tropical hardwood dowel and eased into
the tube.
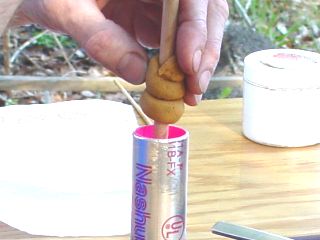
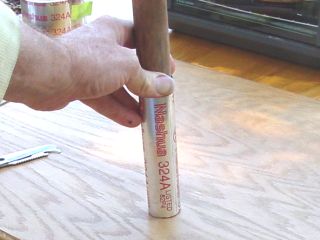
The warm, soft propellant is packed to the bottom of the mold with a slender
stick. If the propellant sticks to the stick, stick the stick in some
water and wipe most of it off. That should end the sticking for a few
pokes.

When you get to the top of the tube, you might notice that the coring rod
isn't perfectly centered at that end. Not to worry. Just press
the propellant DOWN on the near side to move the stick toward the middle.
That will make a little crater, so press in another little blob of
propellant to bring that end of the grain up level.
Side note: I didn't do it here, but using a poking stick one web-width
in diameter will help to keep the coring rod centered. In this case
the web thickness is 3/8ths inch, same as the diameter of the coring rod.
Is that a coincidence or what!
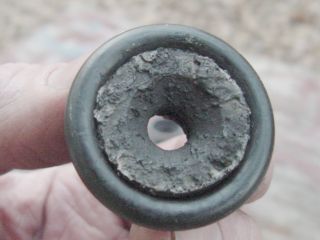
To make the top-end grain pretty, I press another 1-1/4 inch washer down
on that end. This washer has a larger hole, about 1/2 inch. I
hope one day to obtain some washers with a 3/8ths inch hole so they can be
used for centering as well.
Now before you walk off, be sure to give the coring rod a twist to break
it free from the propellant. If you don't do it now, you may have a
heckuva time doing it later.
At least with rcandy, if the rod gets totally stuck you can just put the
whole thing back in a 200 degree toaster oven, soften the propellant, and
remove the stick. You will probably have to remake the grain, but can
recover the propellant. On the other hand, this stuff is cheap, and
a grain with Ti in it would make quite a sparkler, don't you think? And
the coring rod would make a good handle....

Cooling of the grain is patiently supervised by Mr. Buckley.
As dawn breaks, the new grain emerges from its casing. This grain
could be fired as it is for a progressive burn, and I am tempted...
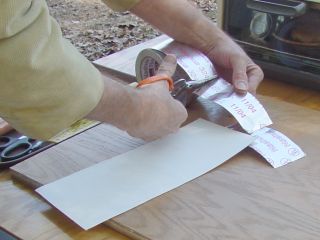
But I have an experiment in mind, and so will cut it into three equal sections.
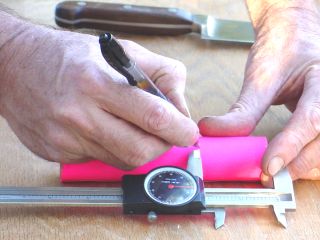
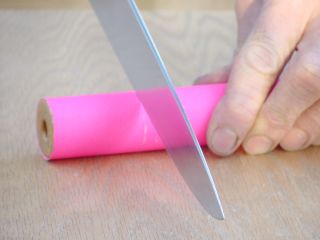
You were wondering about the chef's knife, weren't you? It's one of
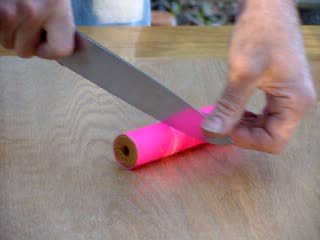
my favorite tools. The inhibitor tube is marked into exact thirds, the
casing is scored all the way around, and the knife blade rolled around and
around until the inhibitor is cut completely through. The grains can
then be broken off by hand. Yes, the ends are a bit uneven, but I don't
think it matters a whole lot.
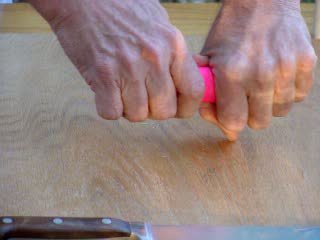
Wanna see some action? Here is a video of me breaking up that grain:
<><><>
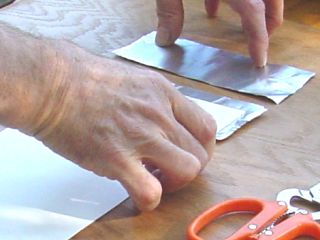
Grains get dropped into the case liner tube. Here is the experiment.
I am placing squares of black match paper between the grains and at
the ends. I suspect this will improve ignition by spreading flame at
the grain junctions more readily than would be spread by the propellant flame
itself.

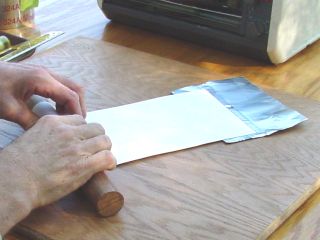
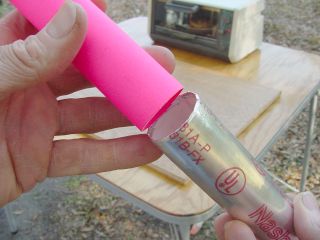
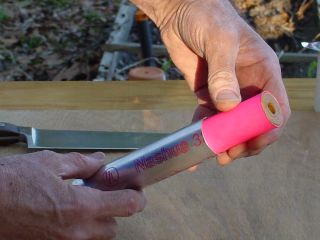
All three grains are in, time to seal up this package. Note that the
case liner tube is now slam full. Doesn't that warm your heart? I'm
cutting another piece of foil tape to cover one end.
Might as well put a piece of match paper at the ends too, else the tape might
be a problem. This foil tape serves as a mediocre inhibitor. It
works very well by itself in model rocket
motors, moderately well in 29mm motors, and not very well in 38mm motors.
I haven't tried it in my 54mm motor, and probably won't. But
sticking this tape directly to the end of the grain might delay or even prevent
its ignition. The match paper keeps the tape off the grain, and should
spread flame. Maybe I should have cut it round to fit better. Darn!
Another experiment!
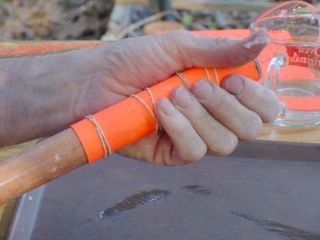
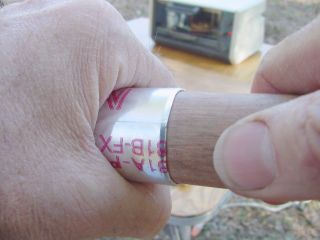
The tape is hand-pressed onto the liner tube.
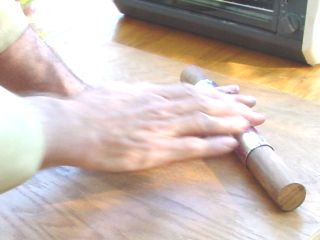
Hand pressing leaves some folds and gaps, so a motor casing is used to swage
the tape all the way flush. It works pretty well - what a handy tube!
Then I roll the package a time or two on a flat surface to even things
out, and it is done!
The finished load a thing of beauty. It should be airtight, watertight,
spark resistant, loyal, trustworthy, and brave. I imagine that the
propellant will keep inside one of these for a long time. Just how
long? Well, I need to do some tests on that issue.
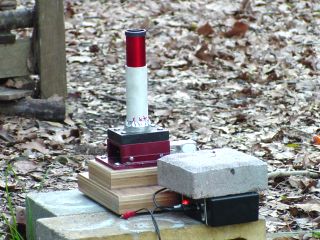
Loading the motor casing
Here are some photos of a load I made and fired a few days earlier. Click here to see details
of this test.
The load is placed in the motor casing with its end-seals intact, thus the
propellant is still sealed from air until the moment the ignitor needs to
be inserted.
The forward bulkhead and nozzle assemblies still need to be installed. It
is hoped that some of these parts can be included in the package at a future
date.
The tube remains sealed inside the motor casing. If needed, it can
be removed from the casing without breaking the seal.
But if one were using a delay-grain in the forward bulkhead, it might be
a good idea to poke a hole in the forward end of the package before loading
it in the casing. Then again, the propellant does not seem to have
any problem burning through that one layer of tape, and the tape would ensure
that the delay grain was ignited by the motor, not by the ignitor. This
may require some experimenting!
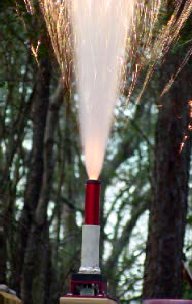
Test Firing
Here the motor is placed in a test stand, and I am about to make a hole in
the foil so the ignitor can be inserted. The pointy thing is a chopstick.
Very useful things, chopsticks. Besides providing us Americans
with humorous dining experiences, they can be used to poke and prod where
fingers don't easily go. This one has a little epoxy on the end because
I used it to mix the stuff once. And it reinforced the tip pretty well.
In this experiment, I ran the pointy thing all the way down the motor, to
make a hole through each of the little pads of black match paper.
The Test
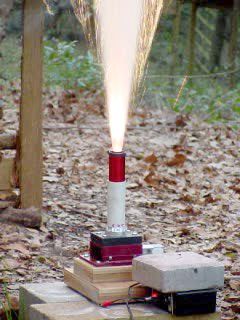
Click Here for a
video of this test
(900K .mpg, 3.5 seconds of video)
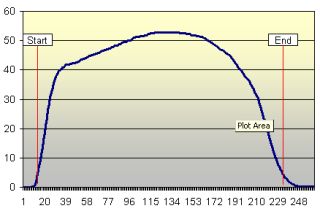
Click Here for an
Excel spreadsheet describing this motor's performance.
Hey! I'm not used to getting pretty thrust-curves. I need to
try that again
Another Test
3/5/05 - Similar test using even-slower burning propellant
(no photo yet - it's getting developed.)
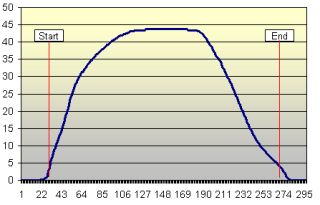
Click Here for the
Excel spreadsheet on this motor test
That's not too bad either. I suspect that the black match paper is
helping to get the grains going by providing a strong ignition source between
the grains. Otherwise they may lag behind, generating a progressive
thrust curve when the burn should have been "neutral." Check out my
tests page for these.
Autopsy
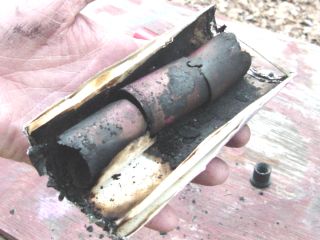
Quick Quiz: What item was missing in my assembly photos?
Answer: Aerotech users got this one 100% - It's the fiber washers
that protects the O-rings from exhaust gasses.
And guess what? You don't really need them in these loads. The foil
tape apparently provides enough protection for at least a 38-360 firing. Note
that the nozzle-side O-ring is not badly burned. Under a microscope,
the O-ring shows a few shallow zorched spots, but nothing mission-threatening.
It could be used again. I have seen much worse burns with commercial
Aerotech reloads and washers.
The inhibitor tubes are burned away at the ends, but that is to be expected.
They are intact in the middles, which is to be hoped. The thrust
curve suggests good inhibition.
Case liner is burned somewhat. The first layer of posterboard is about
50 percent burned away. The second layer is about 1/3 gone, the third
layer is almost entirely still there. It has a scorch-mark here and
there, but has not allowed burn-through at any point. The aluminum-foil-tape
covering is completely intact.
The motor tube needs little cleaning. Soaking in water and a wipe
inside and out is generally adequate. But I have found some buildup
of sticky stuff inside the 360 motor casing, probably glue melted out of
the foil tape. It is soft, so probably not epoxy. WD-40 cleans
it off with a little scrubbing.
One more test
Oh, here is today's experiment. Essentially the same thing but using
the 38-480 casing with four Bates grains.
Click Here
for the Tests page, containing an analysis and video of this test.
The motor performed well, but the thrust curve was truncated by my leaving
the INA125 amp at too high a gain level. That needed to happen at some
point, I had to prove that one needs to reserve some headroom in these tests.
That will teach me. Well, probably not much.
Again, liner held OK, case cleaned up with a rinse and a wipe. Mid-H
performance despite the flat top curve.
This page is submitted for amusement and enlightenment purposes only. Any
other use is strictly forbidden by some law, somewhere, no doubt.
Comments, criticisms, additions, and bad jokes are welcomed!
Flash Forward!
September 5th, 2005
After four months of Florida swelter, I pulled out a "tidy package" moonburner load I'd
made for launch back in June but did not get a chance to fire. It has
been sitting in my magazine since it was made on 6/5/05.
I decided that it was time to fire it. I expected it to be all
gummy because the 54mm loads I had assembled back then had a thick coat of
goo, despite being "sealed" inside their commercial paper/phenolic case liner
tubes. Somehow they had leaked a little moist air. I scraped
off the soft stuff down to hard propellant, and they worked OK.
But this one, when opened, was crisp. No trace of moisture, no gummy
stuff. It was as dry as the day it was made! I fired it as test 9-5-05B, and its performance is nominal.
Now this is just one test. I have not yet done quality-control sampling
of this technique, but the fact that it worked once suggests that it might
work again, perhaps reliably.
Recrystallized Rocketry
home page
Jimmy Yawn
3/7/05
rev. 12/10/05
jyawn@sfcc.net