Model Rocket
Motors
Nozzles - Pressed Bentonite Clay
Materials:
-
18mm Motor tubes (made in previous step)
-
Bentonite clay, 200 mesh or finer
Tools:
-
1/2 inch hardwood dowel, 4 to 6 inches long
-
1/2 teaspoon measuring spoon
-
Hammer or mallet of some sort
-
Solid surface upon which to hammer
-
Nozzle-reamer (from previous page)
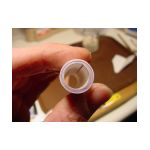
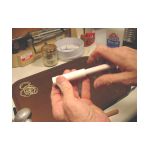
Here is a tube made yesterday. It is 2.75 inches long and 0.71 inches
in diameter (18mm) The inside diameter is a little over 1/2 inch.
They vary some, but average about 0.515 inches ID.
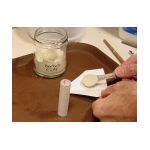
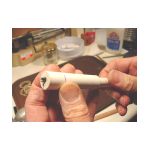
1/2 teaspoon dry Bentonite clay is funnelled into the tube which
is politely standing on end. Wooden dowel (rammer) is inserted and
pressed down to contact the dry clay, while holding the tube down firmly
so that the clay does not exit the open end.
A few taps of the mallet, say 8 or 10, and the first part of the clay
plug is set. The another 1/2 teaspoon of clay is added, the rammer
re-inserted, and the second bit of clay compressed with 8 or 10 more whacks.
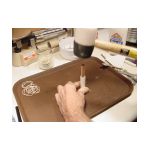
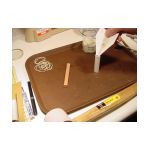
Now to be fair I must tell you that I did not do much hammering on
this counter. That was set up for the photo. After a coupla
light taps I took this gizmo outside, put it on a concrete block, and hammered
it well. This is not a delicate operation. You can use most
any hammer or mallet, but use heavy ones with restraint. It is quite
possible to destroy the casing - hammer too much or too hard, and the clay
will split the casing. This rubber mallet works OK, but I think a
wooden mallet might be ideal. I will try that one day.
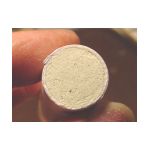
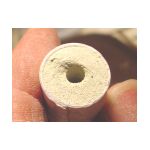
One teaspoon of clay, packed in two increments, created a plug with
a depth of 0.71 inches. That may be overkill. I will experiment
with shorter nozzles to see if they hold, and modify this page if it works
OK. But this nozzle depth is conservative, not likely to blow out,
and leaves enough room for propellant to create a full "C" motor.
The magic of Bentonite is that it becomes solid when rammed. No
need to wet it and wait for it to dry, to shrink away from the tubing wall
and become loose. It can be used right away, no need to defer gratification,
or to put off that experiment until next weekend. Find out if it
works today, so you can think about it until next weekend.
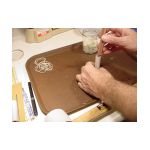
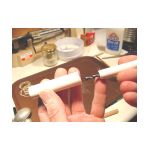
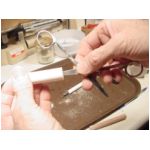
So we must now make a nozzle in this clay plug.
Since the nozzle reamer is completed (right?) that will be quick and
easy. The reamer is inserted into the plugged tube and twisted until
it drills its way through the clay to open air. This usually flakes
the bottom of the nozzle plug in an unsightly manner, but we will take
care of that shortly.
The first reamer I made used an abused old drill bit. It
took a lot of twisting and turning to make a hole. I sharpened it
by hand and it improved a little, but sharpening drill bits is not my forté.
Then I tried a masonry bit. It worked OK, but was slow. This
one is excellent. It uses a brand-new twist bit. Highly recommended.

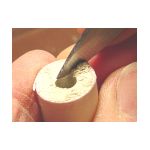
An exit cone is made by reaming the nozzle pilot with a suitably-shaped
knife blade, or in this case a pair of surgical scissors. Their taper
is a bit too steep. I need to find or make a better reamer for this
purpose. Any suggestions?
Since the end of the nozzle was chipped, I determine to make it pretty
and scrape with a knife blade to make a small taper. This is primarily
for aesthetics. I don't think a few greeblies at this end matter
very much. I am willing to be corrected on that matter if anyone
would like to enlighten me.
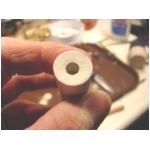
Case is ready for the propellant!
Next...Making the Grain