 Sturdy cardboard tubes suitable for making model-rocket class motors.
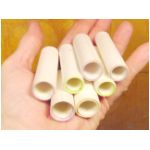
Various sizes pictured here, but for a standard 18mm model rocket motor, the size is:
The Product:
Sturdy cardboard tubes suitable for making model-rocket class motors.
Various sizes pictured here, but for a standard 18mm model rocket motor,
the size is:
Length: 2.75 inches,
Outside Diameter: 0.71 inch
Inside Diameter: 0.5 inch
Materials:
|
(1) The sheets vary somewhat, ranging from as little as 0.012 inches us to 0.018 inches. These other thicknesses can be used, but you might need to adjust the length of the strip you cut accordingly. (2) White glue like Elmer's will do, just don't dilute it with as much water. |
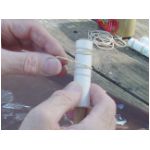
Take yer hardwood dowel and cover it with a strip of plastic tape. Stick it down smoothly and well. If it wrinkles, kinks, or refuses to stick, tear it off and start over. Tape is cheap. You might need to sand the rod a little to get the tape to stick well.

| Note that this box tape is wide enough to go around the dowel sideways so that is what I am doing. Clear tape actually sticks better than brown tape, but I am using the brown tape because it is easier for you to see. Isn't that thoughtful of me? |
Also, I have found that the aluminum-foil duct tape works very well for this purpose. Note that this is NOT the cheap plastic "Duck Tape," but a heavy aluminum foil tape that is backed with a thin stretchy polymer and a very sticky glue. The type I use is Nashua 322A or 324A by Tyco Adhesives |
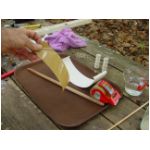
Time to cut some strips
Determine the bias of your posterboard by gently rolling the whole sheet into a tube one way, then the other. It will tell you which way it wants to roll. Whichever way rolls the easiest, that is the bias.
Cut your strips with the bias so that they will roll into little tubes
without a fight.
Roll with the bias, they roll smooth.
Roll against the bias, they will crinkle. Crinkling is bad.
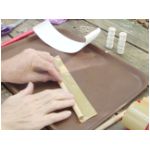
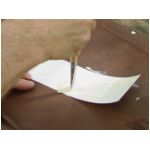
Now lay out the posterboard and cut a strip 2.75 inches wide and as
long as the posterboard, usually 30 inches.
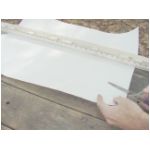
Notice that this posterboard wants to roll in the direction I am cutting.
That is good. That's the bias. I generally store this stuff
rolled up into a big tube and secured with a rubber band. This way
the bias is annoyingly obvious, making it hard to unroll. That's
why the posterboard is weighted down with a cheap level.
Cut the long strip into two smaller ones, each12 inches long. There will be a 6-inch strip left over. I guess that with a little better planning, this bit of waste could be eliminated, but these pieces are good for mixing epoxy, making laundry notes, scooping up dead roaches, all kinds of things.
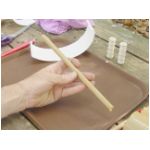
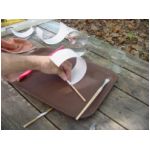
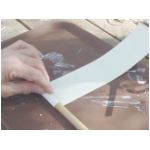
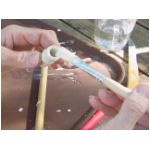
Pre-rolling the strip
Start the posterboard strip by rolling one end around the 1/4 inch dowel.
This gives it a pre-curl that will hug the inside of the finished tube.
Omit this step, and you are likely to have a gap under the first layer
(see "Bad Examples" below.) Gaps like this (delaminations) can cause
your motor to fail big time, primarily by leaking hot exhaust gas forward
and causing the ejection charge to fire prematurely. Much of the
fiddly stuff below is to keep gaps from happening. Tubes with gaps
should not be used as motor tubes but don't throw them out - they have their uses, as we shall
see.
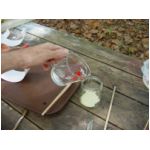
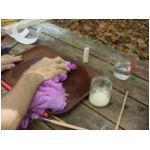
Mix up stickum
Pour a little yellow wood glue into a mixing container. Each motor
tube will require roughly 1/2 teaspoon of glue.
Dilute the glue with a little water, just enough let it spread easily
with the brush.
For Titebond glue the proportions are roughly half glue, half water.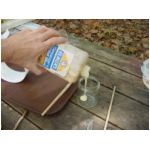
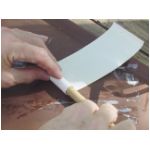
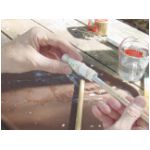
Paint the strip
Lay the strip out flat and slather on a generous dose of glue.
Swish the brush the long way, then sideways, and repeat a couple of times
to get the glue evenly distributed. I usually leave the last inch
of the pre-curled end unpainted. No sense trying to glue the paper to the
stick - we will want it off soon.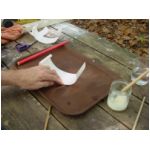
Roll it up!
Lay the rolling rod on the pre-curled end, and roll the strip firmly
around the rod. If it starts going crooked, back off a bit, adjust
the direction of the roll, and start again.
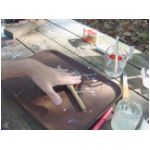
Then roll it on the table or between your hands a time or two to even
out the glue.
Secure the tube with a few rubber bands. Keep them a bit loose - don't make them so tight that they will choke or distort the tube.
Slip the tube gently off the rolling rod. The tape covering lets you do this, otherwise, the tube is likely to glue itself to the dowel. If you accidentally squeeze the tube flat, just stick the rod back in to round it out.
Paint the ends and inside heavily with glue, then dab off the excess.
This seals the ends and inside flap, making delaminations much less likely
Set the tube aside in a good place to dry. After 10 minutes or
so the rubber bands can be removed, or they can stay there until the tube
is hard.
But don't stop with just one - you are gonna want a bunch of them.
Clean off the rolling surface with a damp towel, wipe off the rolling rod, and make some more.
Sometimes when in a hurry I will let these harden for a few hours
then put them in a low oven to dry more quickly. It works, but it
is risky. They delaminate much more when heated, so it is better
to plan ahead and let them slowly air-dry. If you oven-dry, be sure to check your tubes even more carefully.
Some Bad Examples:
Note in the picture above, only the lowest tube is really good.
The top tube is dreadfully delaminated - it was made from two of those
little end-strips mentioned above. That was a bad use for them.
Well...if that's the worst mistake I made that day, then I did better than
average!
The one to the right was not pre-curled enough, causing a subtle but serious flat-side delamination.
The one to the left just wasn't rolled very well. But to be fair, this is one of those "hurry-up" batches that was dried in my toaster-oven. Also, the ends were not coated with glue after rolling. I hadn't figured that one out at this point.
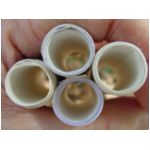
Some Good Examples:
Here is a better batch, which were air-dried for a few days
After thorough drying, these tubes are remarkably tough. Occasionally
I think about making furniture from them.
Interesting colors on the ends were from the marking pen used to scribe the cutting lines. Nice effect, don't you think?
Next: Adding the nozzle!
A little clay, a dowel, a brick, and a few good whacks...