
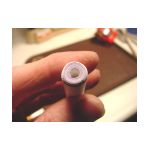
The Product: a solid paper rod that just fits inside your motor tube casings, with a drill bit sticking an inch of so out of one end.
The Purpose: To drill a nozzle pilot hole straight and true through the Bentonite clay plug which will soon be created in one end of the motor tube.
Materials:
Strip of poster-board, 10.5 inches long, 4 to 5 inches wide
3/16ths inch high-speed drill bit, preferably a new one.
Water-based wood glue, same stuff we used in making the motor tubes
Epoxy, 5 minute will do, slower is Ok
Tools:
Thin rod of some kind, 3/16ths diameter or smaller and 6 inches long
or longer
Paint brush
Plastic box tape
Technique:
Step 1
Make the nozzle reamer
The purpose of this tool is to make a nozzle channel in the pressed
clay plug that will be illustrated in the next
page.
This step is presented here, as it takes a day for the glue to dry,
and will be needed when making nozzles in the motor tubes.
If you wonder why on Earth we would want to do such a thing, please look at the Nozzles page and it should become clear.
And experienced rocketeers may wonder why I should propose making
nozzles by such an inefficient manner. Remember that this method
is intended for those just getting started, who may not have access to
a machine shop in which to make better nozzle-forming tools. Such tools are available from pyrotechnic suppliers such as FireFox and Skylighter. You can also buy ready-made motor tubes from these folks, if you want to go that route.
To continue this route...
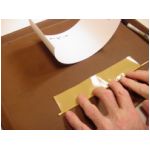
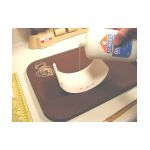
Cut a strip of poster-board 4 inches wide and 10 inches long. Make sure to cut on the bias so that it wants to roll up the long way.
Cover the bamboo skewer with a strip of box tape. The covered skewer should be a little smaller in diameter than the 3/16 inch drill bit, which measures 3/16 inch in diameter, strangely enough.
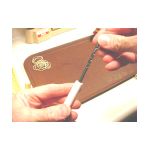
Roll one end of the posterboard strip around the skewer tightly, and
work it until it is nicely curled and wants to stay curled. This
will help a lot in rolling this tube tightly, which is a bit of a challenge.
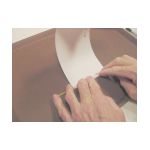

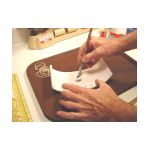
Pour about a teaspoon of Elmer's (or diluted carpenter's glue) on the
strip and spread it out evenly with the brush. Add a little more
glue if needed to get full coverage.
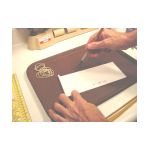
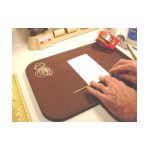
Roll the strip around the covered skewer, making sure it is as tight
as possible at the beginning. It is nearly impossible to get it perfectly
tight, that is why the covered skewer should be a bit smaller than the
drill bit. Secure with rubber bands if necessary to keep it from
unrolling for a few minutes.
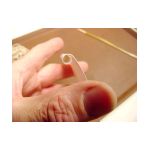
Remove the skewer, and let the tube dry for a day or two. It will
shrink a bit as it dries.
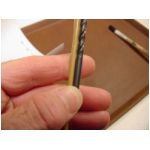
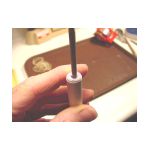
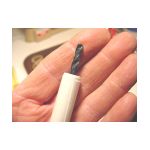
Insert the 3/16 inch bit shank into the tube opening. If it goes
in easily, use a few drops of epoxy to secure it. 5-minute epoxy
will do. Leave 1 inch of drill bit exposed. I pushed this one
in a little too far - it is long enough, but just barely.
Next... Back to Nozzles
Something to use this cute little reamer on!
The Magic of Bentonite Clay