
Small, cheap video camera that flies.
|
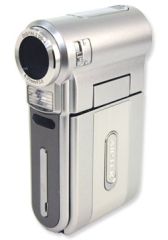
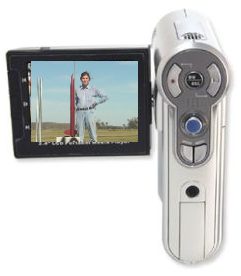
Going Aiptek
Small, cheap video camera that flies. |
|
 |
I had already purchased a tube for it. After seeing the camera rocket
that Richard Creamer and Steve Ghioto had flown back in August I ordered a section of "polycarbonate tubing" from McMaster-Carr (Stock # 8585K21, $11.46 per linear foot as of 4/10/07)
This tube is a nominal 3 inch outside diameter, and a tight friction-fit inside the 3-inch Quantum Tube I use in the Sugar Rush. Inside diameter is 2-3/4ths inches. Steve and Richard had used the "One-Use" digital camcorder available from CVS pharmacies. It is a remarkable little camera, but the official deal isn't very good. You "buy" the camera for $29.95, shoot up to 20 minutes of video, return it to the store and they will burn your video to DVD for another $12.95. And they keep the camera! No doubt to erase, re-package, and "sell" again. $43.90 for 20 minutes of mediocre-quality video? I think not. |
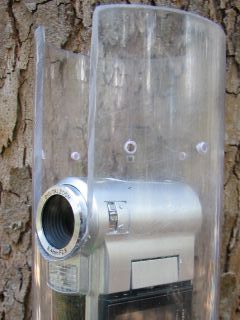 |
Sometimes
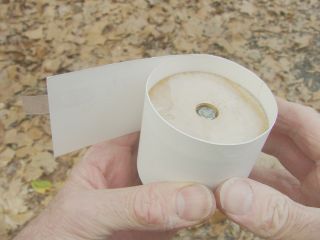
you can ram two problems together and get a solution. I really like it when I can pull that off. The other problem? Shooting video through thick, curvy plastic. I was not enamored with the idea of shooting video through the tubing wall, since this "clear" tubing is not perfectly so. It can't help but distort things. Solution? I decided to make a hole for the lens. Using a 1-1/16th inch spade bit, I drilled a hole centered 2-3/4ths inches from one end of the tube. The spade bit made a rough hole. Next time I'll try a hole saw or something nicer. But a few minutes with a round file made it acceptably smooth. Then the table saw was used to cut a slot down to meet the lens hole. This allows the camera to drop into the tube easily, with the lens bezel extending about halfway to the OD of the tubing. It fits pretty well, with the camera "hanging" in its slot. |
| Here is another puzzle to ponder... The camera turns on when the LCD panel is opened. Nice. Open it up, it comes on. Handy. When the LCD panel is closed, it turns off. Problem. Big problem. There is no way the camera will fit in the tube with the LCD panel open, and there seems to be no way to keep it on with the panel closed. I searched the menus for a way to disable this option. None. I looked in the cracks and crevices to find the switch. Couldn't see it. I started to take the thing apart. After removing a few tiny screws I was interrupted, and in the interim realized the probability of destroying the camera is close to 1. So I put the screws back and the camera lives to record another day. In desperation, I even read the manual. Can you believe it? The MANUAL! No clues there either. |
|
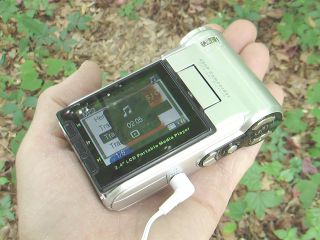 |
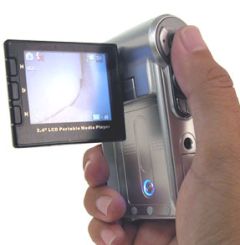
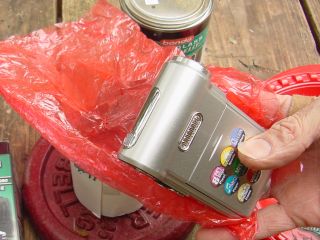
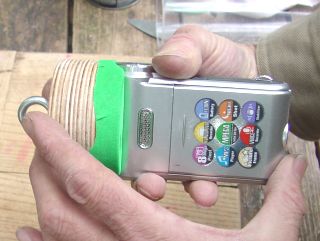
Then when fiddling around, I discovered that the LCD panel can be swiveled all
the way around and folded back into its spot, nice and neat! This returns
the camera to a form very closely resembling it's OFF mode, but with
two significant differences: 1) It stays on! 2) I
can see the LCD panel. That was a revelation. Now I can make
it work, and without even violating the warranty. See the headphone jack? I'm using it to play oldie-goldie MP3 files as I take this picuture. It does that too. |
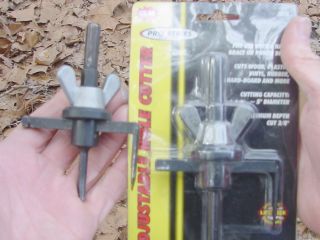
| Cruising
around the cheap-tool shelf at Tractor Supply,
I succumbed to another impulse purchase. This time, it's an adjustable hole cutter.
It was only $9.95. Those marketing folks are so clever. If it had been $10. I would have walked put it back. It looked pretty cheesy, but the price was right so I walked out with it. Well that's not exactly true...I stood in line, paid for it, then walked out. These transactions go a lot smoother when one hands the cashier money or some acceptable substitute. So I'm told. I haven't tried it the other way. But I know some folks who have. They do Community Service hours under my "supervision." Note that by now I have two of these hole cutters. That's a clue. It works better than it looks. The hole cutter is infinitely adjustable within its range, provided one has the infinite patience to adjust it, which can take several test-holes. It can cut holes in 1/4th inch hardwood plywood with reasonable ease and a bit of smoke. |
 |
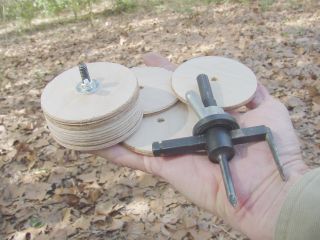 |
Here are a few, cut 2.8 inches in diameter, just a bit too large to fit in
the polycarbonate tube. We will fix that later. Each disk has a 1/4th inch dia.pilot hole. This is handy for gluing them together using a 1/4th inch screw and wingnut to clamp them together. The pilot hole is tight on the 1/4th inch dia. screw, so I cleaned it out with a 1/4th inch wood bit. Now it fits smoothly and snugly. The stack to the left is 6 disks that have been spread with Elmer's glue. Or Titebond, I forget. The screw holds them tight until the glue has set. Then the plug is sanded on the belt-sander until it slips easily into the polycarbonate tube. The plan is to put two of these bulkheads inside a section of tubing with the camera in between, so that it can't slide fore and aft. |
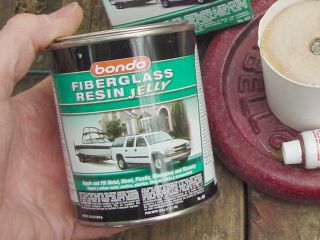
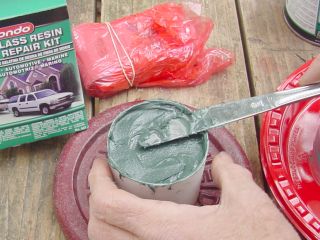
| But
just squeezing the camera in between these plugs doesn't seem right.
It could slip and tip against the smooth wood. So I pull out another lucky find. I think this came from from Pep Boys: Bondo Fiberglass Resin Jelly. It's much thicker than the usual fiberglass resin, much like an epoxy gel - which could probably be used instead. It mixes up just like Bondo body filler, which it resembles, it's just heavier and stronger. But you know, Bondo is fairly tough and might work OK. I may try it on the next one. |
 |
  |
First,
I want to make sure I can get a grip on this thing when it's installed
in the tube. So I drill a recess in one end, install a 1/4th inch eye-bold
from the other, and epoxy everything in place. Then a strip of
poster-board is taped around it to create a collar, creating a "cup"
about 1/2 inch deep. This will hold the resin. |
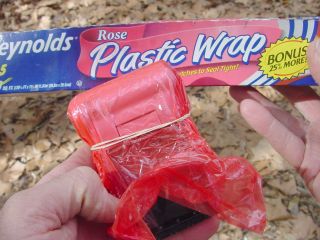  |
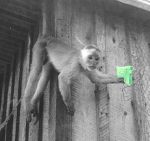
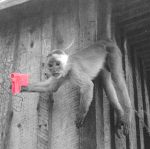
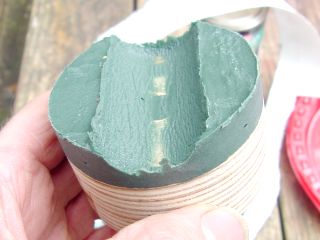
The camera is wrapped with several layers of plastic wrap. I used red wrap so it is easy to see in the photos. I'm sure clear wrap would work just fine. Posterboard cup is filled almost to the top with resin gel, and mounted on a weight so that it is level and stable. |
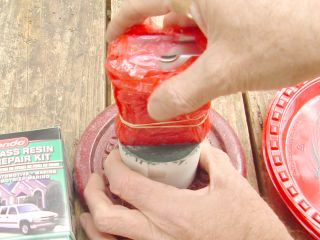 |
And the two are mated! I'm sure that little camera is frightened... I would be! But after about 30 minutes the gel has set, the camera is removed, unwrapped, and found to be OK. No resin seepage, and the resin did not dissolve the plastic wrap....guess I could have checked for that possibility before risking the camera but I didn't. |
 |
| It might have been a good
idea to use some kind of jig to make sure the camera was square with
the plug, thus would fit straight in the tube. I just eyeballed
it, and in fact it is a little crooked but not enough to matter. Removing the paper collar, I get a rough impression of a rough impression. A minute on the belt sander improves the flat surface and trues up the outside edge. I wrapped sandpaper around a 1-inch dowel to sand the groove a bit. |
 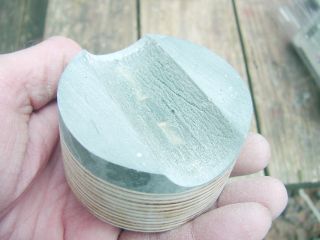 |
The plug is sanded a little more so that it slips in the tube without resistance. It seems willing to clamp the camera down, holding it against the bottom of the cutout. The plug is still somewhat rough and ugly but that should not matter.... Because I'm going to dress it up! |
 |
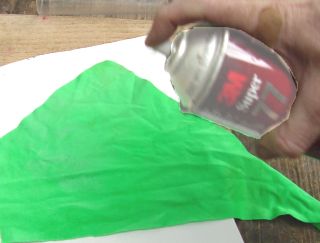  |
Here
I have found a scrap of green green Lycra that will match the shocking-pink
Sugar Rush nicely, don't you think? Sprayed it with 3M Super 77 glue and quickly pressed the plug onto it. (I use this technique to resurface mouse-pads in the lab... works great!) |
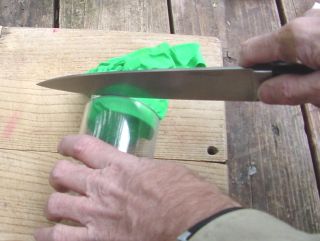
| The
plug is inserted in the polycarbonate tube as far as it will go,
and a sharp knife used to cut the excess cloth so it can be pulled off.
The cloth creates a snug friction-fit so that the plug slides in smoothly without scratching the plastic too much. Not that it matters. . |
  |
 |
Removing
the plug from the tube, I press the head-end of the camera into its
recess, hoping that the glue will make it stick to the plug and thus
conform. (This photo is a reconstruction after the event - I covered the camera with plastic wrap during the real thing) The cloth stuck pretty well on the head end, but when I made another plug for the lower end I took too long and the material did not stick in the grooves. It works fine anyway, just doesn't look as good. |
 |
This one doesn't look all that great either, with a bunch of dark spots where excess glue seeped through the thin material, but it's stuck! | 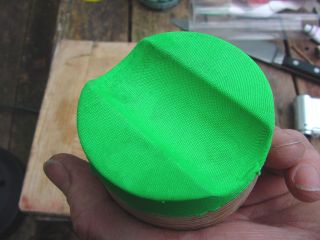 |
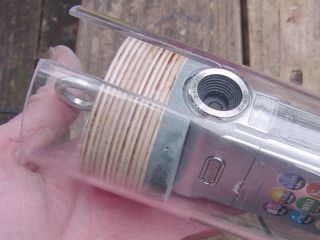
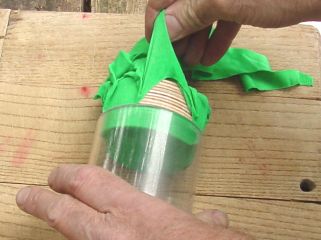
| As
mentioned, a bottom plug is made in the same manner, just using the
bottom of the camera to mold the resin instead of the top. I cut the plastic tube 8 inches long, to allow an inch or so more length than the camera and both of its plugs. Here are both plugs, friction-fitted. Astute observers will note that I finished the bottom plug before the top one. Doesn't bother me. Since that surgery, I am no longer astute. |
 |
 |
For the lower end, I squeezed the tube into a section of 3-inch dia.
Quantum Tube, drilled 4 pilot holes and inserted small 3/4th inch long
wood screws. These are long enough to penetrate deeply into the wooden plug, locking it, the plastic tube, and the body tube in place. It took a bit of wrestling to get the polycarbonate tube into the Quantum tube - it's a tight fit. Good. The camera mount is part of the body tube so it needs to be stiff. |
| Things are not so tight at the top end. Because of the slot, the top end of the tube can be compressed a bit, so it's much easier to squeeze inside the Quantum tube. That's a good thing, since it needs to be squoze and unsquozed every flight. I will compensate by using more screws. |
 |
 |
Since it is a little bit looser, I used eight 1/2 inch long screws
instead. Shorter screws go in and out more quickly. Guess I should get wedgehead screws and countersink them
for better aerodynamics, but this is what I had on hand at the moment.
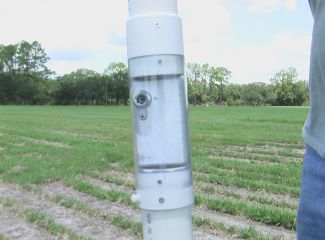
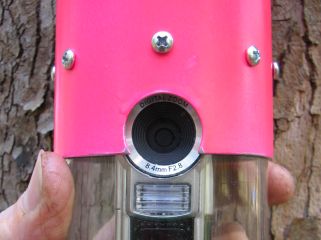
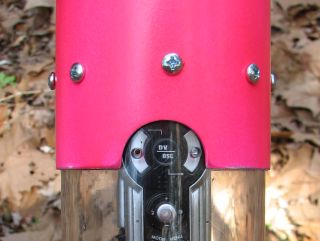
Flatter screws might cut down the wind noise too. As in the base plug, each screw goes through the Quantum Tube, through the polycarbonate tube, and aways into the wooden plug to lock them all together. As you can see, I cut a peep-hole for both the lens and for the control buttons on the back. These were drilled in a solid piece of tubing, which was then cut at that level. This seemed much easier than trying to drill off the edge of a piece. |
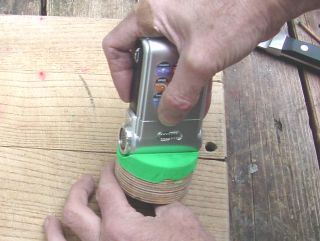
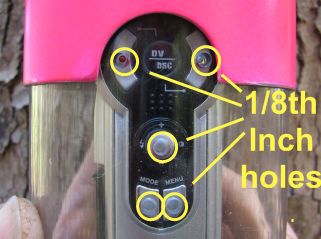
| So now that the camera is locked down in the tube and the
tube is locked into the airframe sections, I can worry about how to get
the darned thing recording when that magic moment arrives. The solution is crude. With the camera mounted firmly, I marked a spot over each button, removed the camera, and drilled a small hole in each spot. This lets me push the buttons with some kind of poking stick. I try to remember to take a bamboo skewer out to the launch pad, but often forget. Fortunately my altimeter-arming screwdriver serves this purpose OK. |
 |

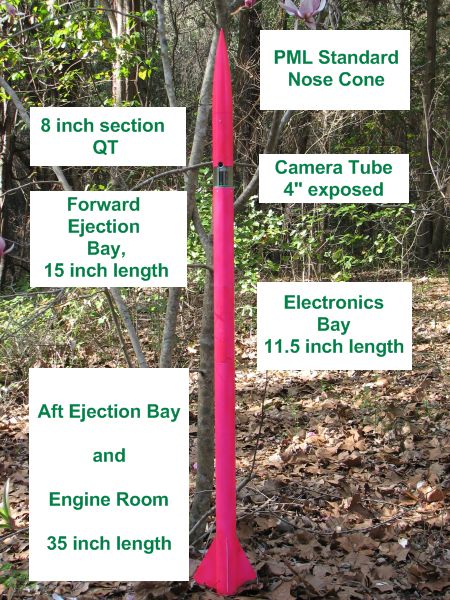 |
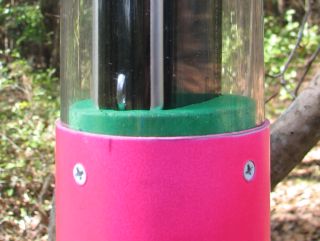
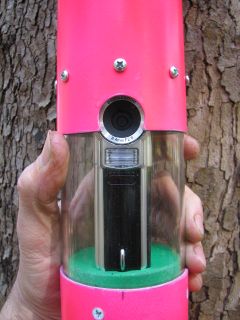
Nose cone is attached to an 8-inch section of Quantum Tube with 4 short screws. The 8-inch tube slides over the upper 2 inches of the clear camera tube, where it is secured with 8 short screws. These screws penetrate into the forward wooden plug, securing the head end of the camera. Camera lens pokes through a slot, so that video clarity is not compromised by having to view through the "clear" tubing. 4 inches of clear tube is exposed, allowing view of the camera's buttons. This makes operation of those buttons much more certain, and provides a view of the LCD screen to determine the camera's operational status. The aft end of the camera tube is mounted in a 15 inch section of body tube, secured with 4 longish screws. The aft camera plug is mounted there, and a parachute shock cord attached to its eyebolt. The open area of this tube serves as the forward ejection bay. Electronics bay is modular, with a wooden "cage" which holds 2 electronic devices. Each device is mounted on its own panel, has its own battery, and the different panels can be interchanged rather easily. Currently I am using an ARTS on one panel and a G-Wiz on the other for redundant ejection. (No more core samples for me! I hope!) Fin section has a 54mm motor mount which can take up to a 7-grain motor, plus enough open space for another parachute. The longest motor I've used in it so far is a 5-grain. Hmmm.... |
 |
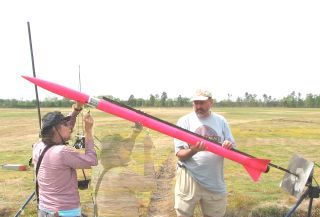
For clarity, here is a visual. If you are still astute, you will notice that I'm arming the altimeters, not the camera.. Once the ARTS is beeping cheerfully and the G-Wiz is singing it's song, I'll start the camera. Then Mike and I will raise it into position. Just imagine me being 18 inches to the left and poking the camera button with a small screwdriver. |
| Hey! Wait! I'm a photo-geek! I'll do a quick/dirty edit. No sense using up imagination for something this trivial. Mike Harris is very patient to put up with this nonsense. |
 |
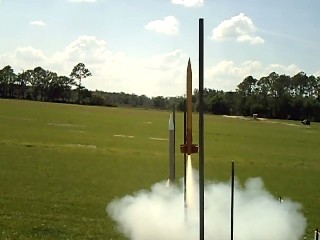  |
Here are stills of other rocket liftoffs, captured by Aiptek as the Sugar Rush sat on the pad waiting its turn. Nowdays I request that it be fired last, so as to catch as many liftoffs as possible. |
 |
So here are the launches, including videos from most of the flights: NEFAR 2/07 - 2 flights, one flight video on web page NEFAR 3/07 - 2 flights, 2 videos Tripoli SC 3/31 and 4/1/07 - five flights, three on page NEFAR 4/07 - one flight, one video |
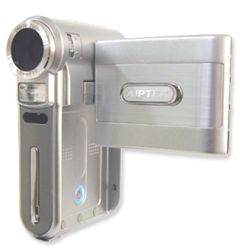
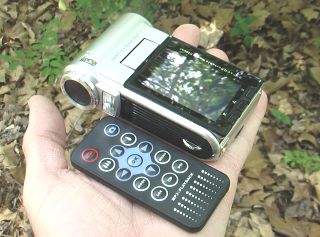
| This model is the MDV-CB It's the same shape and size as the old one, but a little better. It offers slightly higher resolution, an internal battery charger, and ...(click here for drum roll, please)...a remote control! Good news is that the remote works through the clear tubing, so it may not be necessary to drill poke-holes in the next mount I make. I suspect that much of the howling wind-noise in flight videos is from those holes. Guess I could put tape on them for the next flight and find out. But there is a serious omission! There is no POWER button on the remote. So I still have to turn it on before mounting it in the tube. Oh well. Maybe on the next model. |
 |