Based upon a design by Art Applewhite.
 |
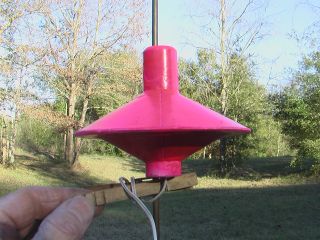
CD Mini-Saucer Based upon a design by Art Applewhite.  |
 |
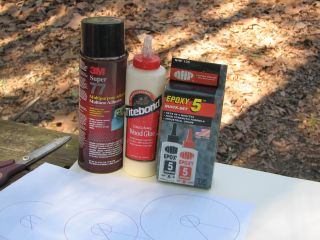 |
3 Sisters On a bright February morning, I get ready to party with three of my favorite glues and some posterboard. I've already printed two of the cone-templates, as you can see. Click Here to download these templates (Word format) |
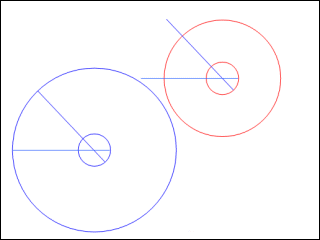 |
Cone Templates The Word file prints out two circles, each with lines marking 1/8th of the circumference. Each circle makes one cone. Two top-cones (large) and two bottom-cones (small) are needed for each saucer, so print two of these. BTW: Since this is in Word, you could insert logos, names, photos... anything that can be printed! You could use good-quality photo paper for excellent results. The challenge? Keeping it clean and pretty through all the glue and roughness to follow. And remembering that you will cut away 1/8th of the picture and there will be a big hole in the middle. |
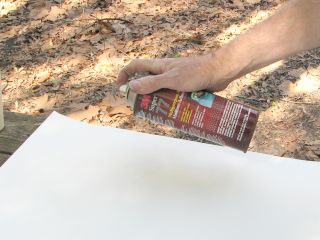 |
Glue #1 I sprayed the posterboard lightly with 3M Super 77 spray glue. |
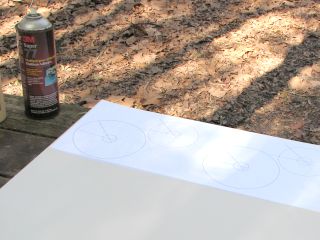 |
...and patted down the templates onto the board. |
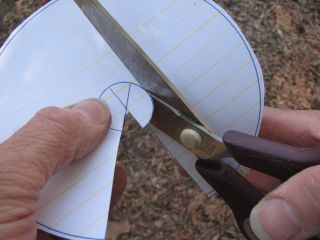 |
After a few minutes' drying time, each "Pac-Man" pre-cone is cut out. |
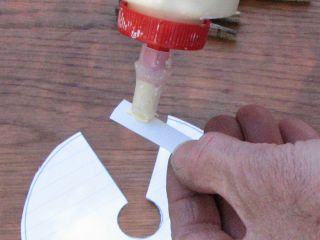 |
Glue 2 A strip of posterboard 1/2 inch wide and 2 inches long is cut out and covered with Titebond. Elmer's glue should work just as well, I just happen to have Titebond out. |
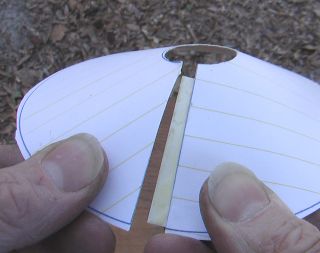 |
Large Cone 1 is formed by bending the edges together and pressing the connecting strip over the junction. Small Cone 1 is done the same way. |
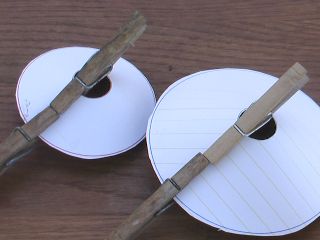 |
Two clothespins are used to clamp the joint while the glue sets. This will only take a few minutes. |
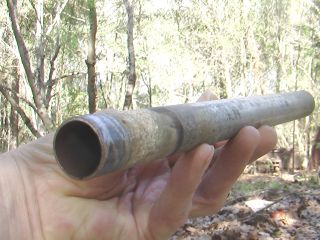 |
And now for something completely different... Holing the CD While the glue dries, I get ready for today's pyro drama. Here is a section of EMT tubing about a foot long. It's outside diameter is 0.925 inch. |
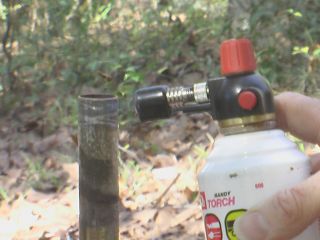 |
Heat the tube One end of the tubing is clamped in a vise so I can heat the other end with a torch. No vise? Just stick one end into the ground. This little torch would do it eventually... |
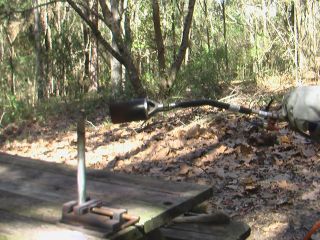 |
...but not quickly. We need a stronger heat source. That's more like it! This scary torch could have the end glowing red pretty quickly, but we don't want it that hot. |
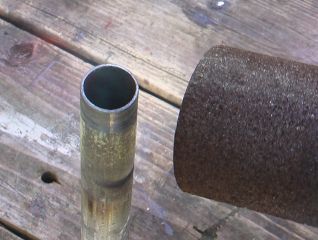 |
Just heat until the metal barely begins to glow. That should be about 900 degrees which is plenty hot. Looks like there is no flame here. Rest assured that there is, a clear, bluish flame encompasses the end of the EMT. |
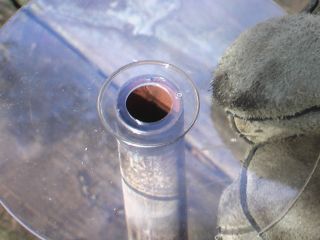 |
Melt the hole The disk is centered over the hot pipe and gently lowered down. The gloves are a good idea - touching that pipe would not be a pleasant thing. And sometimes this action throws little bits of molten plastic. Fi |
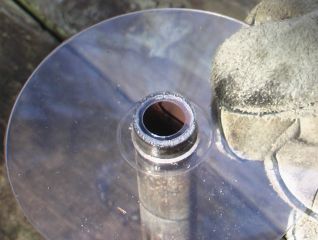 |
Hold your breath! Don't want to breathe plastic fumes!
The disk slips easily onto the pipe. Best thing to do might be to drop it down to the cool part and take it off that end. But NOOOO, I'm not nearly that smart. I took it off the hot end. |
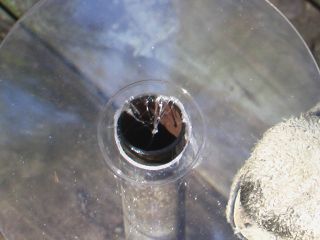 |
So it picks up some greebles. Not to worry. We can fix it. |
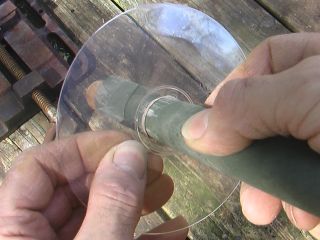 |
Clean the hole After the disk has cooled, I wrap some sandpaper around a dowel and use it to smooth out the hole. If you have a Dremel or similar tool with a tiny sanding drum, this might be a good time to use it. I did. Didn't show you that. |
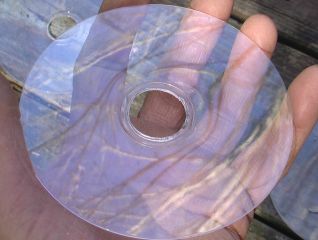 |
So now we have a nearly-centered, nearly-round, and nearly-smooth hole in the disk, with some really nice reflections. |
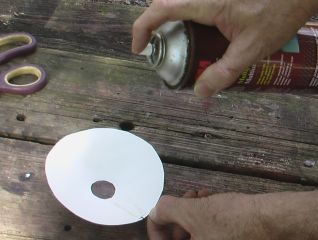 |
Double-layer the cones Back to the cones. They have dried enough. I'm spraying the inside of the first cone with a little Super 77. |
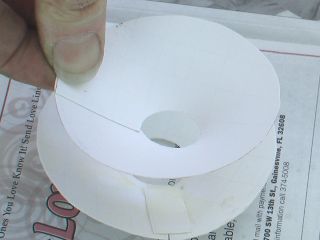 |
The second cone-blank is curled up a little tighter than the
first cone, so that it will fit inside easily. It is lowered into
the first cone, the holes centered, then expanded until it presses
evenly against the first cone and sticks there via the Super 77. Note that I've rotated the second cone so that the bias of the posterboard is crossed. I think this will make for a rounder, stronger double cone. |
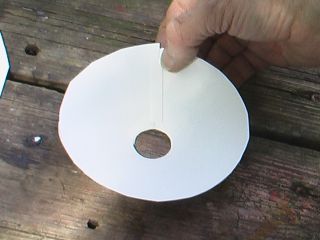 |
Another strip of posterboard 1/2 inch wide x 2 inches long is glued over the seam with Titebond. Since it is not under stress, I can just press it with my fingers for a minute, then let it set. |
 |
Making the motor mount tube Now we need to think about making the tubes. Actually we should have thought about making them yesterday, as they need to dry for a day or two before use. Here I'm checking to posterboard to determine its bias. Most posterboard likes rolling in one direction more than the other, and we want to be nice to it. So try gentle bending, and notice how much resistance you feel. The direction with less resistance is the bias. The tubes will roll much more smoothly in that direction. |
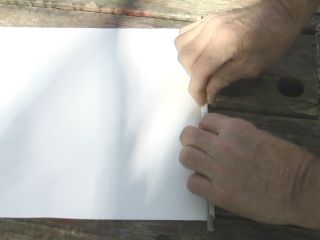 |
Be sure to pre-roll both ends of the posterboard strip before moving on. Here I'm rolling and pinching the posterboard around a 1/4th inch dowel. This is a bit manual, and will tire your hands out if you are doing several. But don't omit this step, or it will make the final roll really hard. |
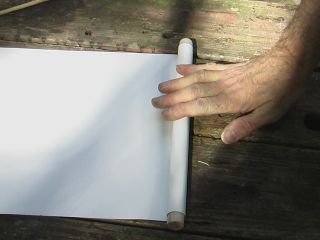 |
I want to have this tube to be a snug fit into the hole in
the CD. It must go in the hole, but it should not be very loose.
We can fill a small gap with epoxy later, but not a large gap.
So I roll the posterboard tightly around the 3/4 inch dowel, allowing it to skew slightly. |
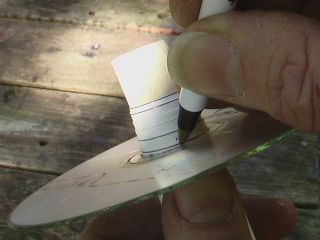 |
The skew makes a ziggurat on one end. The CD is
forced down onto this end until it will go no further, and the
posterboard marked at that point. The mark tells us how long to cut the posterboard. Since posterboard varies in thickness, any single length I give you is likely to be wrong for your posterboard. This method allows you to find the right length for your board, your hole, your personality, etc. I forgot to measure this one. But look, you count 6 turns, right? The dowel is 3/4ths inch diameter, and the hole it's in is about 1 inch diameter. Average diameter is thus 7/8ths inch. So 6 times 0.875 times pi is 16.5 inches. Now I'll have to try that and see if it is right. |
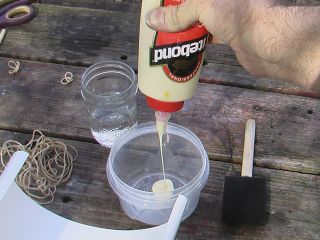 |
This tube is going to need better glue than 3M 77. Titebond is good, but Elmer's works fine. Dilute Titebond with about half water, dilute Elmer's a little less to get a good spreading consistency. |
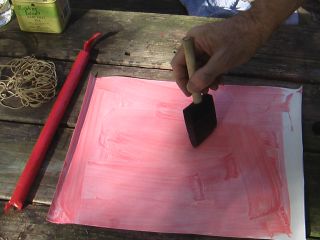 |
The glue is diluted, stirred well, and painted on the posterboard. It just occurred to me to add food coloring to the glue. That way you can see it. So can I. Since this little demo, I've been adding coloring to my glue every time, to ensure that I get good coverage. Note that the 3/4ths inch hardwood dowel has been wrapped with plastic wrap, also red. The wrap keeps this wood glue from sticking to the wood. It does that really well. Aluminum-foil duct tape works even better (Nashua 324A from Tyco Adhesives). |
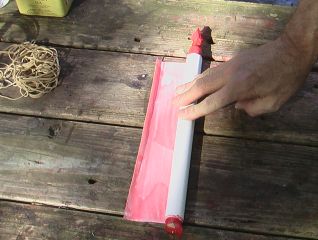 |
The tube is rolled tightly around the 3/4ths inch dowel. |
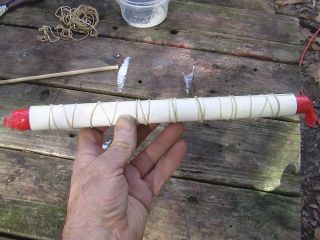 |
Bondage A buncha rubber bands are applied to keep the tube from unrolling. They will only need to be there a few minutes. Slip the tube off the dowel, and place it in a warm spot to dry. The glue will be set within an hour, but the tube will still be wet. You can dry these in a very low oven (150 degrees F) to speed the process, at risk of shrinking and delaminating the tube. Patience. |
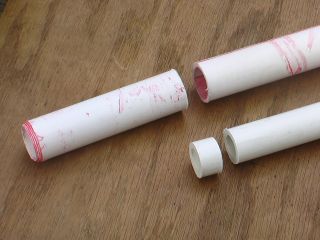 |
After a day in that warm spot, the tubes are pretty dry.
I cut a 3-1/2 inch section of the larger tube to serve as a motor mount, and a 1/2 inch-long section
of the smaller one to serve as a thrust ring. Oh, guess I forgot to do a demo on the smaller tube. It is just like the larger tube, but rolled from an 18-inch long strip of posterboard around a 1/2 inch diameter dowel. Just like making motor tubes, but with a little longer posterboard strip, to ensure a tight fit. It will be glued in the head end of the motor mount tube to prevent the motor from exiting in that direction. You could just use a section of motor tube. It will be loose, so glue it in with epoxy to fill the gap. |
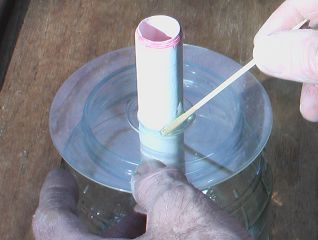 |
Glue #3 The tube is inserted into the CD so that 1.5 inches sticks out from one side. Epoxy is applied to keep it in that position. Note the use of a pickle jar to support the disk |
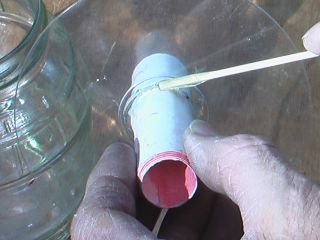 |
Since I can't get the epoxy spread evenly in that position, I'll pick it up and go around and around... |
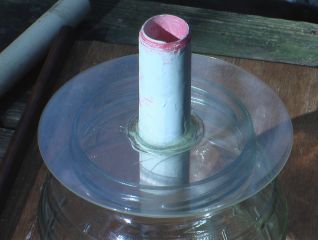 |
Now it gets to sit until the epoxy is hard. Check to be sure the tube is straight... perpendicular to the disk. |
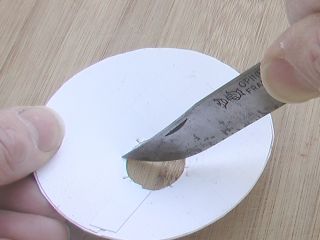 |
Scoring the cone If the hole in the cones is too small to fit over the motor mount tube, try cutting 8 slots, evenly spaced, 1/8th inch deep, around the perimeter of the hole. This should allow the central tube to squeeze in, and may even provide a better glue joint. |
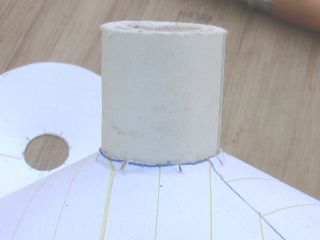 |
Yeah. Here it is, working. The cone is now a tight fit on the motor tube, and the angled "fingers" provide more surface for the glue to stick. Now Elmer's might be the best glue, not that smelly epoxy. |
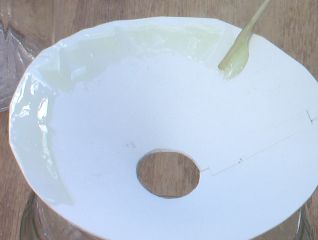 |
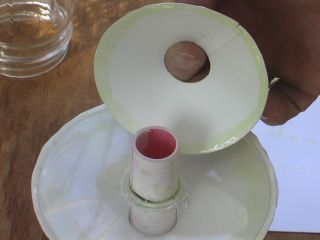
Smelly or not, it's time to mix up some more epoxy. This is applied to the inside of the larger cone, right near the edge. |
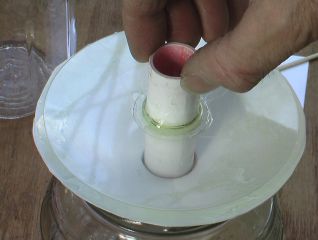 |
The cone is placed in the jar, epoxy-side up. The CD and tube are lowered into it to contact the fresh new epoxy. |
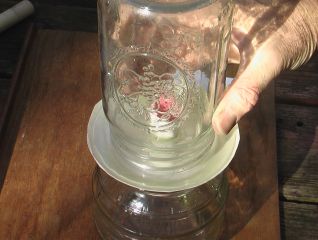 |
And a weight is placed on the CD to press it down into the cone. This is to ensure good contact with the epoxy. You know... this might work better turning it upside down. That way the epoxy would drip down from the cone and fill the gap around the edges. I'll try that next time. OK. I did try it. And you know, it works fine both ways. Take your pick. |
 |
Let that epoxy set, and it's time to do the little cone. Bead of epoxy run around the inside cone... |
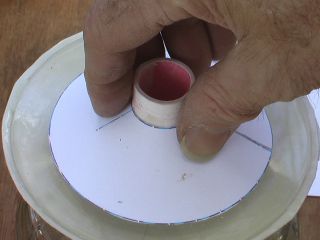 |
And is pressed onto the CD. |
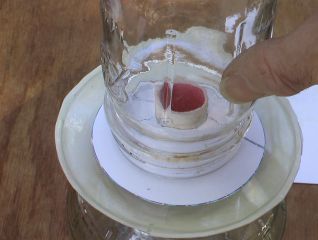 |
Again, the jar holds it down while the glue sets |
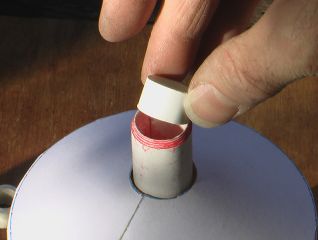 |
Inserting the thrust ring Remember that smaller tube? And the short section we cut from it? That is your thrust ring. It is glued into the end of the motor tube to keep the motor from coming out in that direction. |
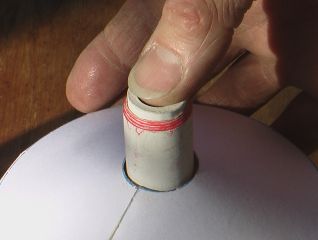 |
If the tube is a snug fit, coat it with a little Elmer's or Titebond glue and press it in. If it is a loose fit, use epoxy instead. Epoxy fills gaps much better than Elmer's. |
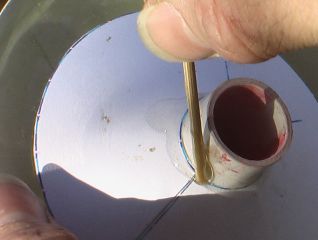 |
Run a nice, neat bead of epoxy around the junction of the lower cone and the motor tube. OK, so my bead isn't neat. But it is strong! Do the same thing to the top. Let the epoxy cure until all is hard. |
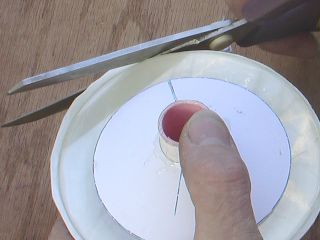 |
Round it out Remember that rough edge on the larger cone? Now is a good time to trim it off. Scissors work well at this point. And since you have the CD as a guide, getting it round is easy. |
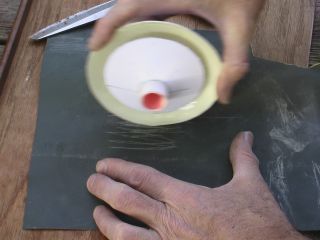 |
There may still be some irregularities on the edge, probably more aesthetic than aerodynamic. Rubbing the edge on sandpaper can remove these irregularities quickly. |
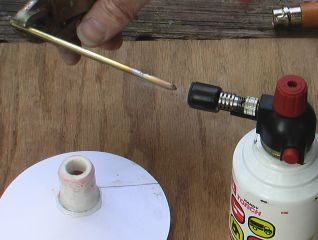 |
Basic (minimal) launch lug Now you might think I'd forgotten about launching this thing. For instance, where is the launch lug? Don't need one! Remember the pyro rule? A 3/16ths inch diameter brass rod is heated pretty hot. Oh, go easy with the torch. Even a little torch like this gets hot enough to melt brass or aluminum. |
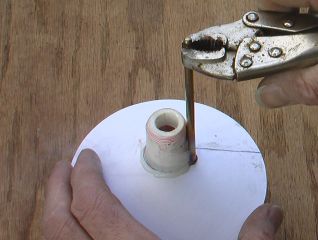 |
The hot rod is used to create a hole right next to the motor tube. You may have to reheat the brass rod a time or two. Try to avoid breathing the smoke. Stand upwind. Hold your breath. Whatever it takes. Epoxy smoke smells really bad, like it might be harmful. |
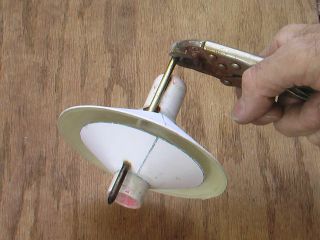 |
This kind of "launch lug" seems to work OK. But
occasionally a saucer gets thrown at a funny angle, makiing me wonder if it is binding on the launch rod. I think it might be good to roll a paper tube on a 3/16th inch rod to make a launch lug, make the hole large enough to accommodate it, and glue a section of it in this hole. But I haven't tried it yet. |
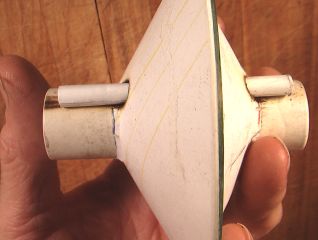 |
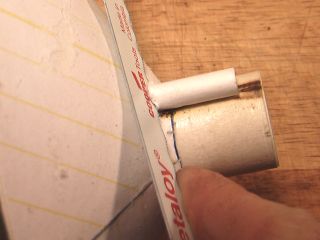
Alternate (better) launch lug OK, so now I've tried it. I made a launch lug tube by spreading Elmer's glue on 1/2 of a 3x5 index card and rolling it around that 3/16ths inch brass rod (which had been allowed to cool, by the way.) The hole throught the saucer is made by heating a long 1/4th inch bolt red hot and easing it through all three layers. The launch lug tube fits fairly tightly in its hole in the CD |
 |
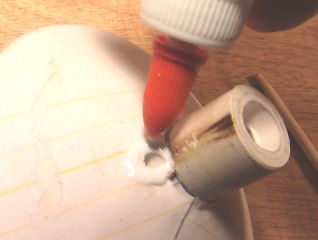
Using a fine hacksaw blade, the excess launch lug is cut off flush with the saucer cone. This should make for a more streamlined appearance. Note the use of the word "appearance." This is intentionally NOT a streamlined airframe. Quite the contrary. |
 |
The ends are glued with Elmer's. Epoxy might be safer, but it's gluing paper to paper so I think Elmer's will be OK here. This is clearly the better method. The saucer slips on and off the rod very smoothly with this internal launch lug. The burned-holes saucers work, but they do not slide as easily, and have that occasional odd jump, as I mentioned. I believe the simpler burned-hole version binds on the launch rod sometimes. |
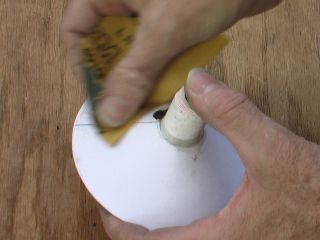 |
Make it smooth It may seem hopeless, but I'm going over this saucer with very fine sandpaper. Somehow, it got gluey fingerprints all over its little body. And I want it smooth for the paint job! |
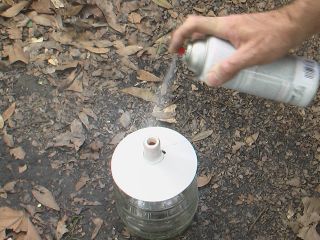 |
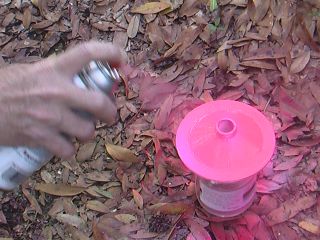
Make it pretty It won't stay pretty, but it's going to start out nice! Here I'm spraying it with white primer, preparing it for the color coat. I like primer. Primer is good. Use primer. It's good. |
 |
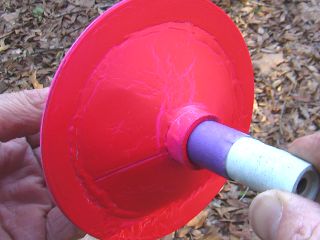
Make it ugly This color might be hard to look at, but it sure is easy to see! These fluorescent paints are very dependent upon their base coat. They are not very opaque, and whatever is underneath the paint shows through. That's why I used the white primer first, and lots of it. After that, a coat or two of clear lacquer is a good idea, to seal in the pink paint, which soils easily. With lacquer to protect it, you can wipe off most dirt and exhaust residue with a damp cloth. Without lacquer, you can rub in most dirt and exhaust residue, but you can't wipe it off. |
 |
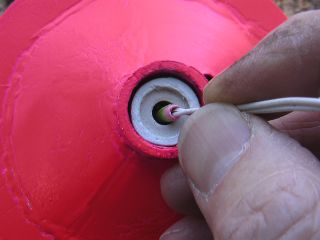
Load 'er up! Another thing that lacquer does is bring out the depth of color, in this case making it more red than pink. Here, I'm inserting an 18mm sugar motor, getting ready to launch. Note that the forward end of the motor is wrapped with purple masking tape to build it up so that it is a snug fit in the motor mount. The motor doesn't need to be very tight, as there is no ejection to deal with. Just tight enough that it doesn't fall out before ignition. |
 |
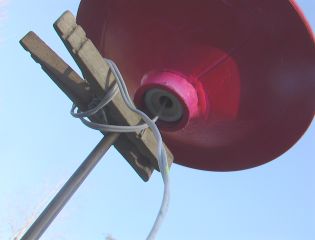
Insert Igniter The foil seal inside the nozzle is pierced, and the igniter inserted. This is just a fuse paper igniter with a tiny pinch of BP inside for insurance. |
 |
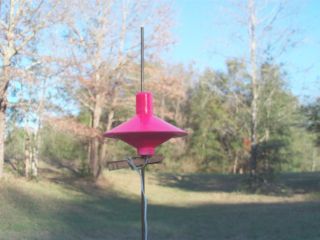
On the rod Now that it's loaded, I gotta launch it, right? Right! Good news is that these little saucers don't need much room, so I can launch it in my backyard with little worry. |
 |
3.... 2.... 1.... Yes, it is pointed up. That last shot was for drama.  Click the button for video of this flight (3 meg .wmv file, 17 seconds playtime) |
| Talking Hands Productions Jimmy Yawn 3/12/08 www.jamesyawn.net |